Wednesday 27 May 2015

X-Wing trench run scenerio.

I’ve seen a few of these babies about but our group have decided to give it a go ourselves.

feel free to comment on these rules. They haven't been play tested but I hope to film the game and publish it here.

So the rules we have come up with are as follows.

Players:
This game is for two teams of players. It would be best to have 3 rebel and 2 or 3 Imperial players

Table Setup:
  1.  Table is 8’ x 4’ with an 8 inch trench running down the middle as shown in the diagram. 
  2. The Exhaust port will be marked 6” from 1 end of the trench.
  3. The Rebels will initially enter from that end and be outside the trench.
  4. The Imperials will enter the table from the other end and will be outside the trench.
  5. It would be best to have the trench as an actual trench and to have clear Perspex to cover it to note which ships are in the trench and which are just flying over it.
Death star trench map
 
Trench warfare:
  • A line will be marked at the halfway point as in the above figure. Once a ship has gone past that line they may not enter the trench. You may start before the line and end after the line.
  • A ship outside the trench cannot shoot at a ship in the trench and visa versa.
  • A ship may enter the trench at either end.
  • A ship cannot turn in the trench.
  • A ship may elect to leave the trench by using its action or affecting a K-turn.
  • A ship may also enter the trench by flying off the imperial end. The ship re-enters the board in the trench and does not receive a stress token.
  • Any straight or slight curve manoeuvre will count as entering the trench, no sharp turns or K-turns maybe used to enter the trench. No manoeuvres may be used to enter the trench ie. barrel rolls. Once the ship has entered the trench he may make a jink as an action to straighten up, then he takes a stress token. Regardless of whether the pilot jinks the ship takes a stress token unless entering from off the table as above.
  • Any ship colliding with another ship in the trench will tank 1 dice of damage each. If a ship manoeuvres into the wall it will take 3 hits that are uncancellable (these are hull hits not to the shield). If a ship takes a damage card it is ejected from the trench. All other actions are cancelled and any “stay on target tokens” are lost. The ship may then make its move as normal.
  • For every turn a rebel ship is in the trench and doesn’t have to roll an evade dice he will collect a “Stay on target token”. This token can be used once you make your attack roll to add an extra dice to your attack roll. A pilot may choose not to roll evade dice in order to acquire a stay on target token.
  • To destroy the Death Star, a Rebel ship must target lock the exhaust port (Except Luke who can use the force. Luke also always rolls an extra dice when firing at the exhaust port) and fire a proton torpedo at it (each Rebel ship is given a free proton torpedo which is only to be used for a shot on the exhaust port). The player must roll at least one crit, one hit and one focus to succeed. All shots at the Port are a minimum of 3 dice.
Fleet Composition:
  • Rebel fleet will contain 1 unit of Y-wings and 5 units of x-wings. Each unit contains 3 ships and only 1 named pilot. Each squadron is made up of up to 80 points.
  • Rebels may swap one squadron for a millennium falcon with Hans solo and chewy for a total of 80 points. Hans cannot enter the game until at least 1 squadron of rebel ships are destroyed.
  • An example of a rebel Squadron is as follows:
                   Luke Skywalker, R2-D2
                   Red Squadron Pilot, R2-D6, Adrenaline Rush
                   Rookie Pilot, R5-K6
  • Imperial fleet contains as many Black Squadron pilots as it wishes but may only have up to 3 squadrons on the board at any time. Each squadron will contain 3 ships and have a value up to 60 points.
  • Darth Vader squadron contains himself, Mauler Mithel and Backstabber with any upgrades up to 80 points. He may not enter the board until the rebels make their first trench run.
  • An example of an Imperial Squadron is as follows:
                    Black Squadron Pilot, Elusiveness, Hull Upgrade
                    Black Squadron Pilot, Expert Handling, Hull Upgrade
                    Black Squadron Pilot, Ruthlessness, Engine Upgrade
  • The imperial side will also control 4 x trench guns and 4 x Turbolaser turrets. Trench guns may be fired but will shoot at every ship in the trench, friend or foe, rolling 2 dice. All ships get an extra evade die for this to a minimum of 1 die. Laser turrets used as normal.
  • No laser turret or trench gun may be closer that range 2 to another laser turret or trench gun.
  • If a ship flies into a laser turret it takes 2 dice worth of damage and the turret takes 1 dice worth of damage. If a laser turret is destroyed it is left as an obstacle.
Win conditions:
  • Rebels win by destroying the death star.
  • Imperials win by destroying all Rebel ships or stopping them from destroying the death star for 10 turns.
 

Monday 4 May 2015

Immoran’s Deadliest Warrior, light Warbeasts edition. The Final


The Final

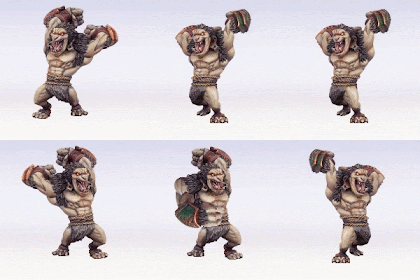
Time for the final of Immoran’s Deadliest Warrior, light Warbeasts edition. And already there is a controversy. After reading my notes I find that Raek was taken out in game 5 by the Woad Watcher but somehow Raek was in the finals. I guess the Woad Watcher is still in his stone form and missed the start. I am up for replaying the finals as has been seen, the tanks excel in the arena events, and the Woad watchers is the Tank of all tanks.

This final shows where the power of Circle and Trolls lie. The majority of winners were from these factions and trolls were right there till the end in most of the previous matches. So the contestants are, in no particular order:

Rotterhorn Griffin. Once it was realised that slams and throws were probably the most powerful attacks in the arena games, they came thick and fast. The Rotternhorn had to survive 3 rounds of fire as he picked up and threw the Pyre troll repeatedly out of the ring.

Raek. Cheated to get here. It was pretty obvious that he was smashed by the Woad Watcher who took very little damage. The end result may have been very different with the Woad Watcher in this final. (Although it forced me to paint raek which turned out pretty good imho)

Troll Bouncer. This Guy is a brute. He can take the punishment and dish it out. Like Gorax this guy is almost a heavy. I would like to call him a medium beast instead of a light. With brace for impact the slams on him are nowhere near as effective.

The Gorax. No not the Doctor Sues book. This guy is a medium warbeast if ever there was one. If primal is used at the right time it could be devastating to its opponent.

Troll Impaler: My favourite going into the final. It needed someone that knew what they were doing to make him work and the assignments are random. Here’s hoping. Knockback on the spear throw was used to great effect in his last bout, hopefully he can do it again.

Cyclops raider: In his match he was set against a lot of shooters and ended up being the best at that art. Of course he hasn’t faced any of the heavy hitters yet and after game 3 the tactics changed drastically.

Swamp troll: The third Troll to make it to the finals. His animi will help him survive.
 

Turn 1: Griffin moves towards the center. Raek moves up (cough cheater cough) Cyclops moves then takes a shot at the Swamp troll hits him but the Swamp troll is able to regen it then uses his animi to go stealthy and moves towards the center. Bouncer rushes forward and takes up a defensive position as the Impaler moves in and shoots at him with his giant spear slamming him 3 inches and doing 6 dmg. Gorax is playing defensively and moves sideways.

Turn 2: griffon moves towards the center. The Cyclops shoots at the Swamp troll and hits getting its attention. The Swamp Troll regens the damage and then shots the Cyclops doing a massive amount of damage and drags him in for an attack. Bouncer heals and moves sideways. Impaler has another shot at the bouncer and misses and Gorax does a little dance . obviously eager to get into the fray but not willing to be unleashed too early.

Turn 3: Griffon slams the Impaler into the wall and cripples his body. Attacks again and does a minor wound. Raek (cheater) charges the Griffon and does a total of 8 dmg. Cyclops attacks the Swamp troll causing a heavy wound. The Swamp troll regens then retaliates and damages the Cyclops then shuffles into the next circle before the walls hit. The Bouncer charges the Cyclops and kills it. The Impaler regens some health to repair its body and takes a half-hearted attack at the Gryffon but misses. And Gorax dances on.

Turn 4: The heavily wounded Griffon attacks the Impaler but can’t hurt it anymore (oh for regen right now). Raek (did I mention he cheated) charges the Impaler and causes a minor wound then hits the Griffon and kills it. Then attacks the Impaler causing 7 dmg.. Swamp troll moves to the 4th circle to keep ahead of the walls and shoots at the Bouncer misses so animi’s. Bouncer moves to the center and hits the Swamp troll but his flail slips right of his slimy hide so he animi’s as well. Impaler regens then hits back at Raek for 7 dmg and the Gorak dances on.

Turn 5: The cheaty Raek attacks the Impaler but most of his impetus has been spent and only causes a flesh wound. The Swamp troll lashes out at the Bouncer but can’t penetrate the thick armour so does his animus in the hopes of surviving the next round. The Bouncer is laughing so hard at the Swamp troll he forgets to hit him. Impaler moves to the center and hits Raek taking out his spirit and body (It’s only a matter of time now) but leaves himself in the charge range of the Gorax who runs in and causes a sever wound (7 dmg). Swamp troll is left outside the wall and takes 5 dmg.

Turn 6: Raek now paying for his cheating ways can barely lift a paw to attack the impaler and does no dmg. Swamp troll has to move but gets hit by the Bouncer who  takes out his spirit and then kills the Swamp troll regening a little more health for his troubles. The Impaler sees how limp Raek is turns his attention to Gorax and does 4 dmg to him. Gorax in turn picks up Raek and throws him out of the ring killing him all the while chanting “Cheater, cheater, cheater”.

Turn 7: With everyone else dead the Bouncer gets first go and charges the Impaler. He slams the Impaler but not far enough to cause any damage so he regens a few more health.  Impaler hits the Bouncer for his audacity and scratches his paint work. The Gorax sees an opportunity and a worthy opponent and attacks the Bouncer doing 5 dmg.

Turn 8: Both the Trolls now turn their attention to the Gorax and manage to kill him, but not before the Gorax gets a  few good hits in.
 
 
Turn the end: Well I called it. The Impaler is right there at the end. The Bouncer is first up though and throws everything he has at the Impaler and manages to kill him. Dreams dashed once again.

This was a really fun match to watch. As I mentioned it may have been different with the Woad Watcher in there, as tanks go well in the arena, but there is no doubt how much damage the Bouncer can give and take. Regen is a great ability and saw most of the trolls survive way longer than they should have. If Gorax could have regened who knows what would have happened.

Still the best Troll (I mean warbeast) won. I’m really looking forward to seeing the big boys duke it out next. I’m going to call a Troll victory in this one as well. Thanks for reading feel free to comment and we’ll see you next time.


Cheers.